In my previous post, Setup a chatmail server for Delta Chat, we went over self-hosting Delta Chat with your own chatmail server; the next step is to start harvesting the fruits of your labor and use Delta Chat.
In the chatmail setup post we used delta.chat.me as our example domain. This was probably a poor choice, because someone else actually owns that chat.me. Given it will be much more rewarding to actually create an account and start chatting, I'll use one of the project's public servers at https://bcc.chat during this how-to, but feel free to substitute the domain for your own chatmail server. I'm not using the default onboarding server at https://nine.testrun.org so that you can get a feel for how to join a non-default server.
For this post, I'm using screenshots from an iOS device. You may notice slight UI differences if you're using a different OS, but they are minimal and shouldn't significantly change any of the workflows described here.
Install the app
To use Delta Chat, you're going to need the app. The Delta Chat developers have a native app for all major platforms, including Android, iOS, Linux, Mac, and Windows. You can go to your device's app store and search for "Delta Chat" or visit https://get.delta.chat and follow the OS-specific download link they provide.
Create a profile
If you visit the home page of a chatmail instance, assuming the maintainer hasn't substantially changed the default website source code, you should see something similar to https://nine.testrun.org, screenshot below (note that you and any other chatmail admin can change your website layout/content, so the server you're using may not look the same).
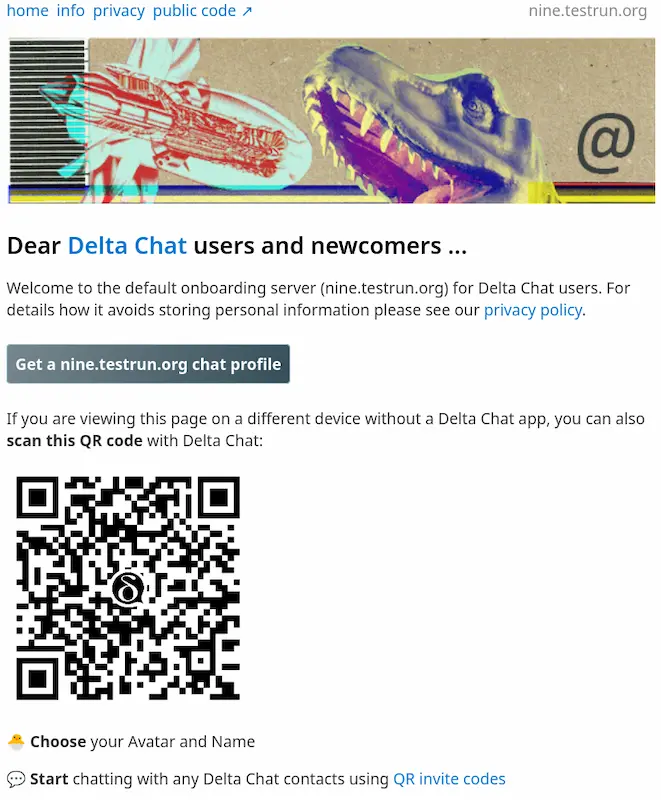
You'll notice there is, both, a link/button and a QR code that will initiate the Delta Chat profile (aka, account) creation process. If you are planning to add the profile using your mobile device and have the webpage open on, say, your computer, scan the QR code, otherwise click the link; they both accomplish the same thing.
We'll begin by opening the app on our phone. If this is the first time you've opened the app, you'll be greeted by the screen below, prompting you to add a new profile (if you're wanting to create an additional profile, click/tap your avatar to bring up the profile switcher, then choose Add Profile to bring you to the same screen). Because we're creating a new profile, we'll choose Create New Profile. By default, Delta Chat will create your new profile on nine.testrun.org. While this is a fine choice to host your chats, it's not the route we're taking today. As such, we're going to choose Use Other Server.
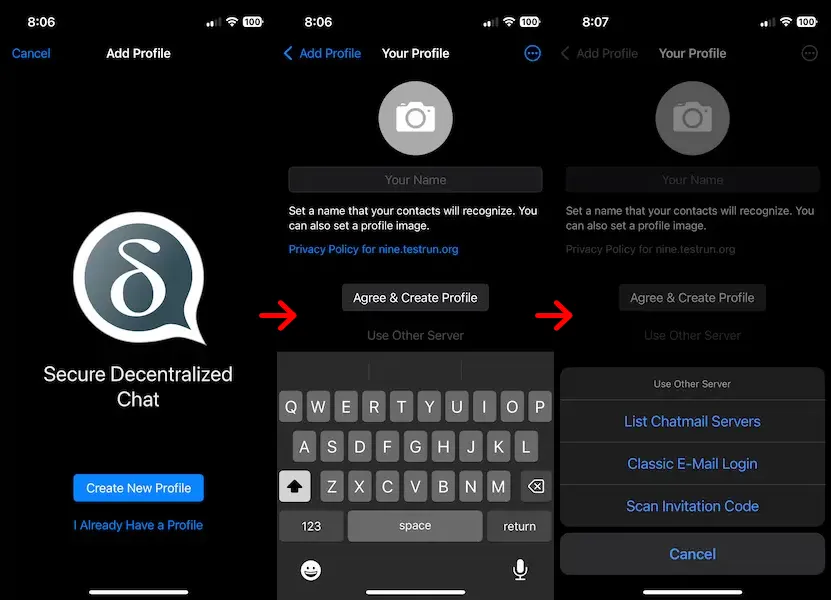
We will then be greeted by a menu of alternatives. Because we have access to the QR code for the server we want to join, we'll choose Scan Invitation Code. This will open your camera (give the Delta Chat app access if prompted), which you will then use to scan the QR code. If you're using your computer, or don't have access to the website on another device to display the QR code, you can navigate to the desired server in your browser and click on the QR code - it will then open the new account screen in your Delta Chat app.
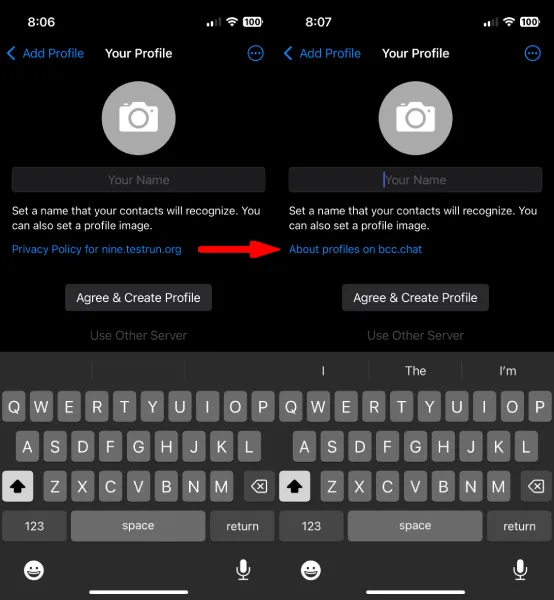
Once you've scanned or clicked the QR code you'll be brought back to the profile creation screen, but you'll notice the link for the "Privacy Policy for nine.testrun.org" will be replaced by "About profiles on bcc.chat"; you're now poised to create a profile on this server.
Enter "Your Name", noting that it will be visible to those that you chat with, and, assuming you agree with the privacy policy of the server you're joining, choose Agree & Create Profile. A progress modal will pop-up, informing you of the status, followed shortly thereafter by a redirection to your new Delta Chat profile.
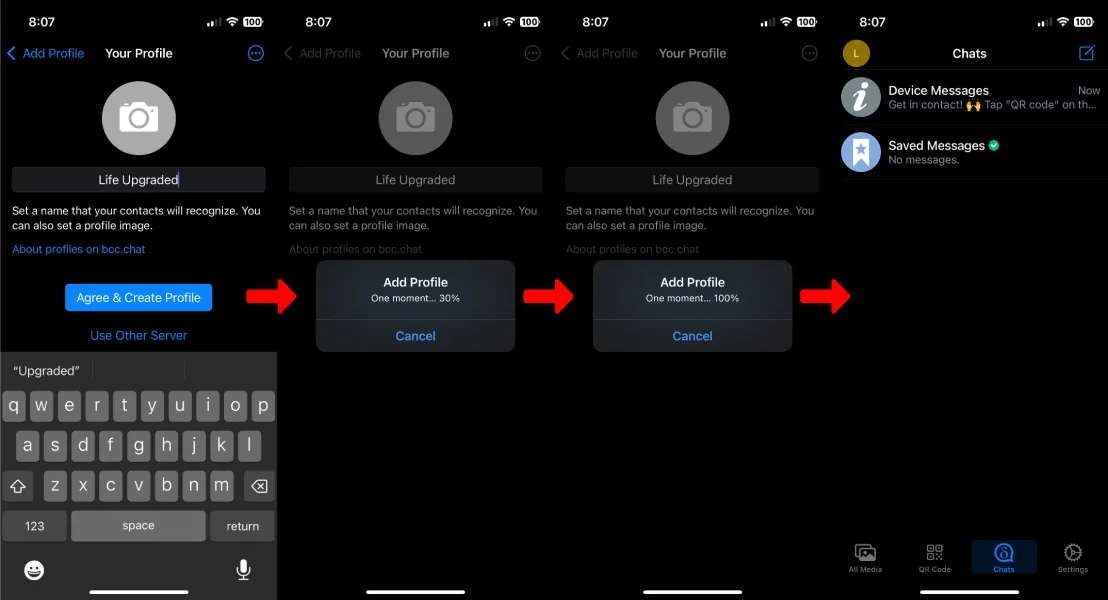
You'll start with two chats in your new profile:
- Device Messages: Messages generated locally in the app to inform you of app updates and other local actions (like when you successfully transfer your account to another device).
- Saved Messages: Basically messages to yourself. These can be forwarded from other chats, notes you write to yourself, etc.
A word about your password (and username)
The section above describes the process that will give you a profile with 1) a randomly generated username and 2) a randomly generated password. You may be thinking, "if I don't know my username or password how will I login on another device?" That's a valid question. The thing is, logging into your account, using your username and password, on a new device won't accomplish your presumed goal of restoring your account to its previous state. The reasons for this are:
- Only the messages that remain on the server will be downloaded. The duration is server-specific, but the default is somewhere around 40 days, so anything sent before that will not be available to download on the new device.
- When you login to your account, a new Autocrypt keypair (possibly incorrect terminology) is generated. This new keypair will not be able to decrypt messages previously sent to you, so you will be unable to read them.
The bottom line, as with any encrypted messaging system, is: don't lose your encryption keys. This means thing to do is backup and restore your account (and/or transfer to a new device via Add Second Device); also covered below.
Create a profile with a custom username
The default account creation workflow, as described above, will yield you an account with a randomly generated username and password. These random usernames aren't an issue, in terms of initiating chats with your contacts, because you'll be using invite links and/or QR codes to add contacts. However, it is still possible to create a custom username, if you so desire.
There is a handful of requirements to keep in mind when choosing a username:
- Each server will set a minimum and maximum allowable username length. For example, nine.testrun.org has a minimum and maximum of nine characters, i.e. you must choose a username of exactly nine characters.
- The username must not already been in use. If it is, your login will fail.
- Your password must be at least minimum length specified by the server admins. For nine.testrun.org this is also nine characters. There are no complexity requirements, however.
- The server admins can block certain words as usernames.
The process of creating your custom username will begin the same as the generating a random one:
- Choose Create New Profile on the initial login screen.
- Choose Use Other Server on the screen that asks you to enter Your Name.
- Unlike earlier, when we chose Scan Invitation Code on the subsequent menu, this time we'll choose Classic E-Mail Login
With the Classic E-Mail Login, you'll be greeted by two input fields: E-Mail Address and Existing Password.
In the E-Mail Address field, type your desired username, followed by @ and the server's domain. For example, if I want my username to be upgradedd (yes, the two ds at the end are on purpose... nine character requirement) at nine.testrun.org, I would enter upgradedd@nine.testrun.org.
In the Existing Password field, enter a password that meets the minimum length requirement. If you're going through the trouble of creating this custom username, you might as well make sure your password is a strong one and you record in a safe place, i.e. your password manager.
That's it. Click/tap Log In and if the username is available, it'll be yours and you'll be brought to your new profile with the two default chats added.
Start chatting
To send messages to someone other than yourself (or even to yourself, but across different accounts), you will need to either send or receive an invite. This can be done by scanning the other person's QR code, if you're in the same place, or sharing an invite link via some other platform, if you're not.
One the bottom row of buttons is QR Code. Tapping this will bring up your QR code, which, if scanned by another person will allow them to start a chat with you.
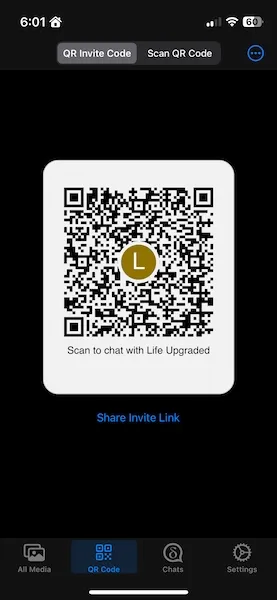
If the person is not in your vicinity, tap Share Invite Link to bring up sharing options, like sending via SMS/other messenger, copying to clipboard, etc. You can share this link, which will behave the same as the QR code, allowing the other person to start a chat with you.
If you're the one looking to start the chat, tap Scan QR Code at the top of the screen to bring up your camera, at which point you can scan their QR code start a chat. If you somehow copied the other person's link to your clipboard, you can choose the three-dot menu in the top right corner to bring up the sharing menu, from which you can choose Paste from Clipboard to the same effect.
Multiple devices
One of the strengths of Delta Chat is the multi-device support. Once setup on a second device (or third, or fourth; there isn't a set maximum), they will operate independently, each able to send and download new messages from the server. It is worth noting that there is currently no facility to manage logged-in devices, so you don't have a way to disconnect a lost device (other than the OS's remote wiping capabilities, whatever they may be).
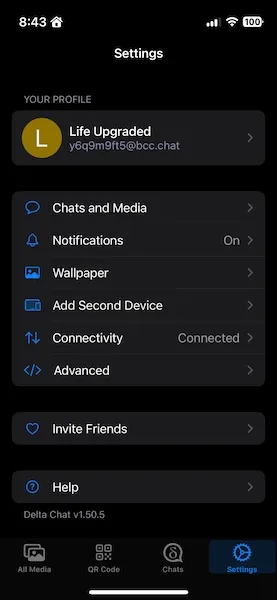
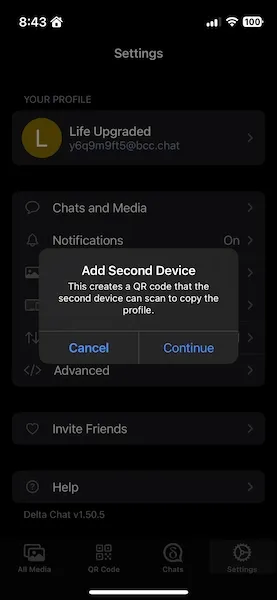
To add a second device, go to Settings and choose Add Second Device. A pop-up will inform you that This creates a QR code that the second device can scan to copy the profile. Click Continue to generate the QR code.
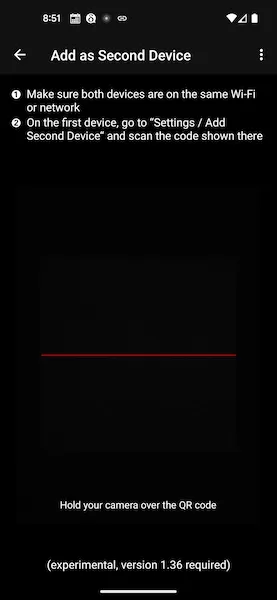
You will then be brought to a screen displaying the QR code and some instructions. First, you must make sure that both devices are on the same Wi-Fi network. Second, and seemily obviously, the second device must have Delta Chat installed.
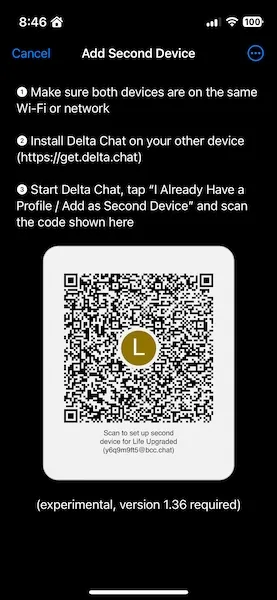
One the new device, you will go through the same routine as outlined above for creating a new profile, except this time, instead of choosing Create New Profile, you'll choose I Already Have A Profile.
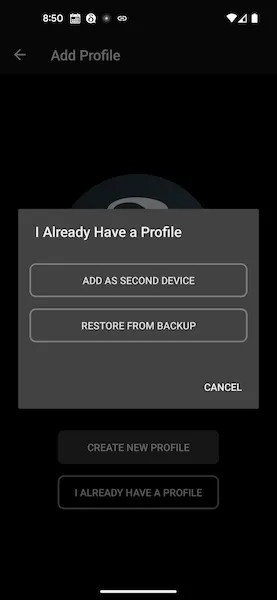
When you choose that you already have a profile, you'll then be asked if you're going to Add As Second Device or Restore From Backup. In this case, we'll choose Add As Second Device, bringing up your camera to scan the QR code from the first device.
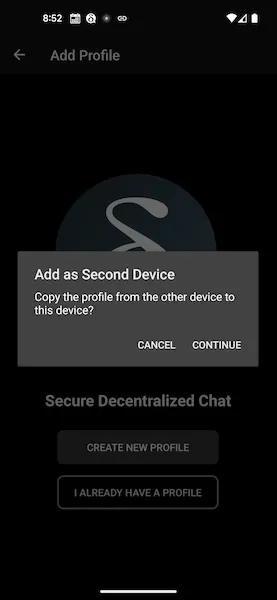
Choose Continue when prompted to copy the profile from the other device, at which point the profile will be copied. The transfer time will depend on the size of the profile being transferred. In the case of the example I created for this post (with basically no messages), it happened so fast I couldn't take a screenshot of the process.
You now have the same profile active on two devices and can use either to send and receive messages.
Backup your profile
Backups are essential with any data you wish to protect, and your Delta Chat profile(s) are no exception. As I mentioned above, you cannot restore your account to its previous state by simply logging back into the server, so at a minimum I recommend you create a backup immediately upon creating your account and save it somewhere safe, like a password manager, an encrypted storage device, etc.
With a backup hand you'll be able to fully restore your account. With that said, periodic backups would be preferable, otherwise you'll not have access to any chat history that is no longer on the server (and I'm not sure about contacts added after the backup point). There is a feature proposal for automatic backups.
Create a backup
To create a backup, you'll start in the app Settings and choose Chats and Media.
Scroll to the bottom of the subsequent screen, where you will see a button labeled Export Backup.
The behavior, at this point, differs slightly between OSs. Specifically, Android gives you the option to backup all of your profiles at once, or only the current profile, whereas iOS, Linux, and Windows will export only the current profile.
Each OS saves the backup to a different location:
- Android:
Files App>All Storage>Internal Storage>Download>delta-chat-backup-[date/time]-[account-name].tar - iOS:
Files App>On My iPhone/iPad>Delta Chat>delta-chat-backup-[date/time]-[account-name].tar - Linux/Windows (and presumably MacOS): You will be prompted to choose the folder in which the backup will be saved.
Restore a backup
The restore process is similar to the addition of a second device.
- On the Add Profile screen (either the first screen on a new install or reached by tapping your avatar to bring up the Switch Profile menu and choosing Add Profile), choose I Already Have a Profile.
- Choose Restore from Backup
- Navigate the file chooser to the location of the backup and select the backup file.
A new profile will now be created from the backup and you can resume messaging.